Sunday 29 October 2017

Task 3 - Addressing Texture Issues

Task 3 - Addressing Texture Issues

From the feedback I have received, I have made some changes to the crates. Some of these are minor, but will help with the overall visual of the assets.

Crate 1

An updated Crate side panel
I decided to replaced the side panel normal with another one that is more cleaner. By using the edit mask and mirror tools, I perfectly applied normal to the selected faces of the model. This made the model look more presentable and remove that visual error.

An emissive error on the model
When I imported the model into the unreal engine, I noticed a strange light coming from the top part of the crate. Upon further inspection I discoverer that the emissive texture has overlapped with a part of the UV, causing the light to appeared from that side. I decided to just rub out the emissive that is close to the edge, but another way is to just re-position that UV part.

Crate 2

The error line on crate 2
The crate 2 model has an unusual artifact on the edges of the model. At first I thought this was just an normal issue, but I realised it is more than just that. The only way I can of fixing this is to re-do all of the UV's. This will cause some hinders to time, but if I have it, I will do it.

The new crate 2
I decided to not just fix the line error but also re-do the whole model. This means that I had to do the UV's again and the textures. The good news is that this is a simple model, meaning that I can do it quickly. With this free time I was able to improve the appearance of the crate in general, which in my opinion lacked some visual effect.

The old crate 2 textures (left) and the new cleaner one (right)
 As you can see in the image above, the UV of the crate 2 have been dramatically improved. Not just it looks cleaner, but the free space allowed me to add much more detail into the model leading to some extra decals in this improved crate 2. I am very pleased with the new improvement, although I still feel it needs some more adjustments. 

Crate 3

The light error
Again like the second crate, there seems to be another normal issue. The doors outline got baked into the base of the model, so what I have to do is re-import the model into substance painter with the doors away from the base. This should fix the issue.


The doors and computer fixed

By just saving the doors as an fbx, I imported them separately and re-applied the textures. Since I was doing this, I also did the same for the computer too because their were errors present in that part of the model. In addition to this I changed the top panel a bit to make it look more like a computer.


  The changes made to crate 3

Taking the alterations further, I added some extra effects to the 3rd crate. The addition of some blood streaks helps make the crate stand out a bit more. The Cabal numbers that I mentioned in my previous blog have also been altered to prevent any copyright issues. While doing this I also found an emissive issue. This was also the same one with the first crate and so it was easily fixed.

Saturday 28 October 2017

Task 3 - Texture Inspiration

Task 3 - Texture Inspiration

Just like the crates, the textures too were made from a reference. below are the references I used for the crates.

Crate 1


I took the design of the lines from one of the games crates and applied it to this model. I want the crate to feel dangerous, so by adding these it will get that feeling. 


I also took the core idea from the game too. Since they were using these kinds of tools, I decided to add one into my model too. That way my crate will fit well into the game.

Crate 2


The whole of crate 2 textures came from a crate in their game. This crate is nothing more than an exact copy, but of an different variety.

Crate 3


The colouration of this crate came from  a model on my pinterest board. I wanted this crate to have an militerary appearance ans so I went for this colour scheme. Plus it is a lot different when compared with the other two.


Some decals from the crate were made by myself...but have their own twist to them. They are cryptic clues that will require the viewer to think outside the box. However one of them is indeed a copyright issue and might have to be removed fro the game. I will explain further about this in one of my blog posts. 

Friday 27 October 2017

Task 3 - Substance Textures

Substance Textures

All of the textures that I need to create my textures can be done on Substance, an industry standard software. It is here that I can apply my normals, AO (Ambient Occlusion) and emissive textures and they can be done every quickly thanks to this software.
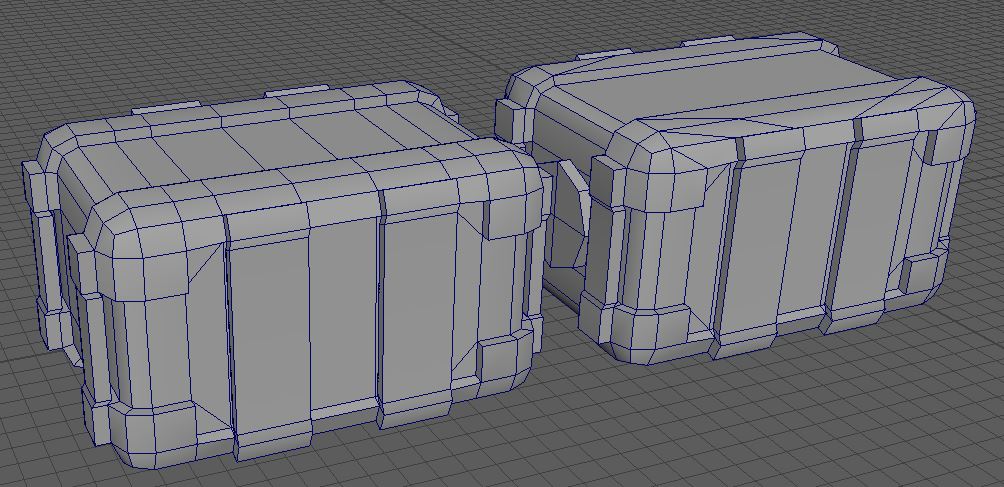
Crate 1 Textures


Since this model was used as a way to practice my techniques, I did the same for the textures. I tried various styles to try to capture the theme from the game project. The decals and normals maps also resembles the references models, but I made a different approach for them. At the moment, I am happy with the process, but the base mesh for the crate does need some work. I tried my best to capture the look of a sci-fi metal, but I have not quite yet got the design laid down. This will be worked on further.
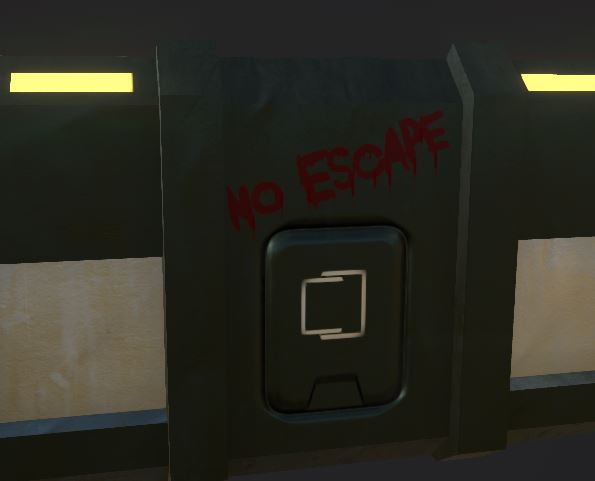
Crate 2 Textures


For the second crate, I tried to get an exact look as on of the crate in the game, by using the brown metal as the base and adding in some simple details. Compared to the last one there is a little amount of detail in this one, so I may want to add some more to this model. However so far I am happy with this design and that is because I knew exactly how I wanted it to look.
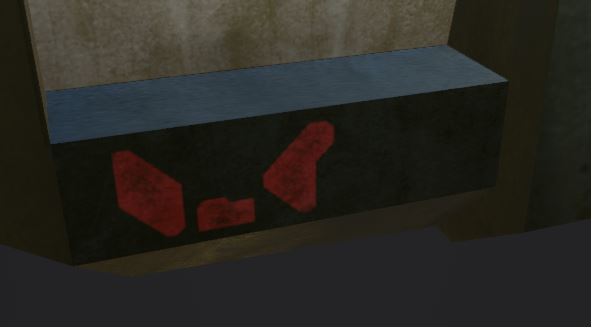
Crate 3


I took I different approach for this crate by using a new colour palette, but at the same time using the same style from the game itself. This crate is looking very good so far and it is by far my favourite one, but I am missing some key decals for this one. These will really help to make it pop some more, but at this current stage it almost looks finished.

All of these crate textures are subject to change and they will be further improved upon during my development process.
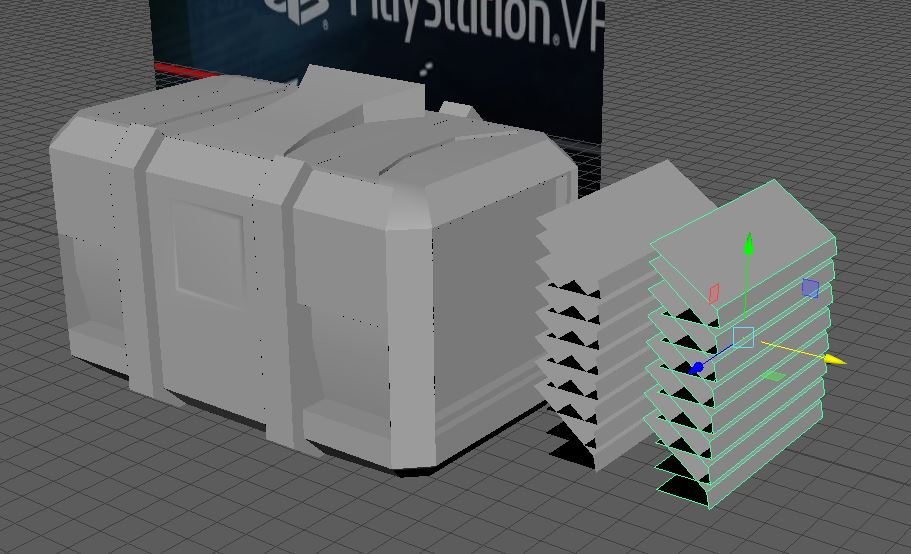
Stand


The stand will not have too much detail, since it will be blocked by the crates. What I did do for this model is to add in an emissive texture around the rings to make it stand out more. The top part used an height map for an more realistic effect to the procedural hexagon textures. I did not not want the stand to follow the same colour scheme as the other crates because it will blend into the model itself. It may have been a small task, but I made sure I put some effort into it, as best as I can.

Task 3 - High Poly Models

High Poly Models

The high poly models will be needed for the substance baking process and for the creation of the textures. Unlike the low poly models, there is no limit for the tri count of these models. But they have to capture the overall shape of the low poly model itself.


From top to bottom: crate 1, 2 and 3 high poly models

As you can see from these images above, the high poly models have been overlapped with the low ones. This is to ensure that I will get a clean bake in the Substance software. I may encounter some errors on the baking result and this can be fixing either by adjusting the settings on Substance or adjusting the high ploy size. In addition to this I also added in the high poly model of the stand too. 

Both the low and high poly have all the correct naming conventions (TP_LR_Crate_Low) and use the right materials.

Task 2 - Model Clean-Ups and fixes

Model Clean-Ups

With the models complete, I can now start the clean up process. This is a way to help reduce the poly count on my models and help to add further details on them if needed. The idea of the clean up is to ensure that you do not break up the structure of the model and the tie-in as much spots as possible. Using triangles is ok as long as the model lighting and shape is not altered.

Crate 1 clean-up - 580 tris Unclean - 936
As you can see from the images above, a vast amount of tris have been freed up from the clean up. At the same time the models structure and lighting has not been affected. In addition to this, the clean-up process will allow the texturing process to appear clean and artifact free once I take it into substance. 

Crate 2 clean-up - 860 tris Unclean - 1004
As with crate 1 this one has had its tris reduced via the clean up. This was not much to do with this one, most of the work was coming from the top and bottom part of the crate. But with the extra free space, I can add additional details if I need to.

Crate 3 Clean-up - 688 Unclean - 1124
The 3rd crate was a little bit tricky. There where a lot of edges that affect the structure of this model in a big way, so I had to think of another way to position the edges lines without affecting the model. But like the last model the number of tri counts ha been reduced and will allow me to do some extra work on them.

Thursday 26 October 2017

Task 2 - Crates Design Highlights and Adjustments

Crates Design Highlights and Adjustments

Following my sketch plans I made the crates under the poly count requirements. I used a lot of techniques to make these, but I will highlight the key task I did in order to complete the style.

Crate 1


In order to get the power core to match exactly to the base model, I used the extract face tool to separate that face. Then it was just a matter of creating the core.


Another method that I used was mirroring. Rather then to just create the whole model, I made one side and the used the mirror tool on the z axis to crate an exact duplicate. This also connects the edges together too.

Crate 2


Creating the bars on this model was a time-consuming process. To make this process a little easier for me, I set the symmetry of the model to follow the middle edge on the model. This in the end will allow me to select to faces on both sides of the model allow me to work on one side while the other is done for me.

Crate 3


The third crate was a complex one to do, which required a lot of models. All of these were grouped together to save me some time, but another technique that helped me was the duplication. By doing a simple CRTL+D command I get the exact same model. Perfect if I am going to use the same model twice. 

Task 2 - Baking the Crate Models

Baking the Crate Models

All of my crate models will have their high poly models baked into the low one. This process will be done on the Substance Painter because it saves me some time and I can also have my other texture maps done at the same time.


To ensure that some of the assets in my model are baked correctly, I crated them in a separated Maya file and baked them to ensure they do not have any artifact errors. Even though you could not see the error due to it being beneath the model, I still wanted to correct it because the player could still see it if they look closer.


Task 2 - Crate UV Light Maps

Crate and UV Light Maps

Because this is going to be added into the engine, I need to make sure that the lighting is acceptable. Even though I can apply a lot of detail in the Unreal Engine, to help further improve the model I can use a light map. These are Textures that contain baked light which, does not affect the lighting in the engine. It's the models way of capturing all of the lighting details and applying them into the engine, without the need of the Engines own.


From top to bottom - Crate 1, 2 and 3

The UV spaces for these light maps are a bit different from the other texture maps. Each UV has to be separated from each-other from 2 spaces and you can now have any overlapping UV. If you do the model will have some light bleeding, affecting the appearance of the asset. All of these UV have been correctly light mapped and are ready to be sent to the Unreal Engine.

Wednesday 25 October 2017

Task 2 Crate UV's

Crate UV's

This process is something that I have to approach very carefully. If the UV's are not done correctly, I will have to do them all over again. This can also be a long process, depending upon the model.

Crate UV's


Top crate 1, middle crate 2, bottom crate 3
All three of these crates have had their UV's shaped to the correct size and laid out with a size of 2048x2048, which is the texture size this unit it currently using. All of the Uv's are ok, but their may be some UV issues on some of the faces. These may need to be unfolded, so that the textures will not be stretched out. Some of these UV shapes may also need to be reduced, but I will not know for sure until a apply the textures. Overall they are all in the 0-1 space and they are ready to be textured. Any further updates will be posted here.

UV Update 23.11.17


Top to bottom: crate 1, 2 and 3 UV's

During the development process, the crate UV's were having some issues at texturing. This is because I did not pay too much attention to the space of the UV's and this was easily fixed by enlarging some of the areas that require more detailed textures. The larger the space the more easily you can see them and this method as applies for the UVs that the player does not see. By reducing their UV's I can add more space and further add some more details to the models as a whole. As I continue work on this I may have to rearrange the UV's some more.

UV Update January 2018


Top to bottom: crate 1, 2 and 3 with clean UV;s

Taking what I have learned from my peers I applied a clean model technique to my crates  to free up some more tris. But to insure my textures are not affect, I had to make sure I am not deleting any edges that will alter the geometry of the models. If given more time, I would have focus more on make the UV's on crate one and there more efficient. Sadly I miss this grave error due to all of the focus on the texture on those crates. It did not affect the crates in the end, however I should have done better.

Tuesday 24 October 2017

Task 2 - Stand Model and UV

Stand Model

with all of the crates complete I can now focus on the stand for my models. Even though this does not count as the main unit, it will still help to make it stand out a bit more.

The Stand Model

As you can see from the image above, this is a simple asset, with a low tri count. Because this stand is not part of the main unit, I do not have to worry about the poly count. Nothing else needs to be added to this model, other then the light maps.

Stand High Poly


The Stand High Poly
Just like the crates, I have also applied the high poly details to the model. Even though this is a small asset and you won't see the details on it, I still decided to add this so that textures will be a much better detail when I take it into substance.

Stand UV


The stand UV
The UV's for the model is also simplified. I made sure that the top face has got a lot of room in the UV space. This is so that the details will not be blurred and can be clear to see.